MX Linux is a powerful midweight Linux distribution for desktops based on Debian’s Stable branch (LTS, extensive software repositories, and excellent hardware support).
It made its debut in 2014 as the result of the collaborative efforts between antiX and the remnants of the MEPIS community. Just like its parent distros, MX Linux is very user-friendly and consumes few system resources, making it a great option for legacy hardware.
MX Linux comes in 3 unique editions: XFCE, KDE Plasma, and Fluxbox. However, the standard edition is the XFCE desktop, which currently uses XFCE 4.18.
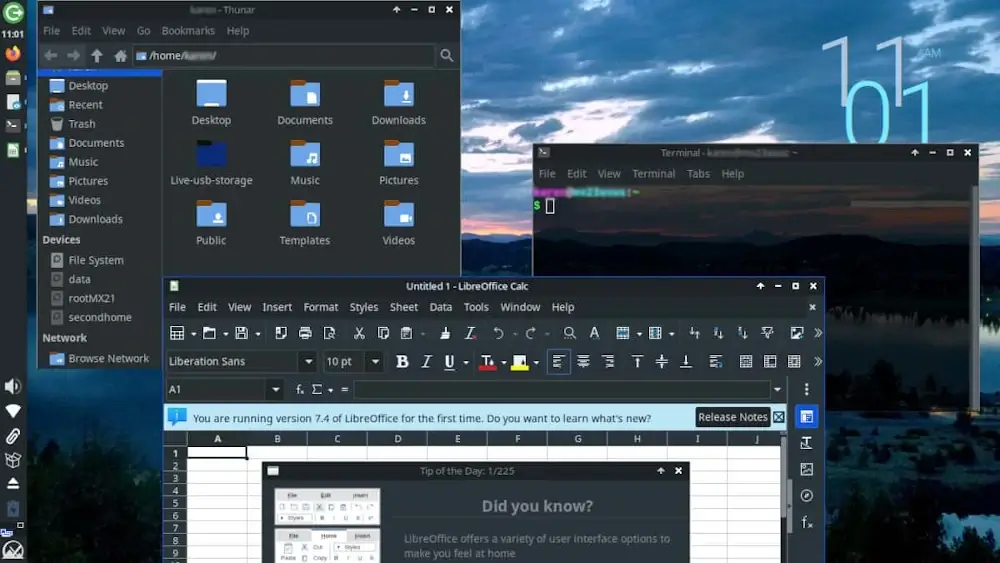
The standard XFCE version is gorgeous, resource-friendly, and comes with a wide array of wallpapers, themes, and icon sets. XFCE is rated for being lightweight, making it a great choice for older hardware with low specifications.
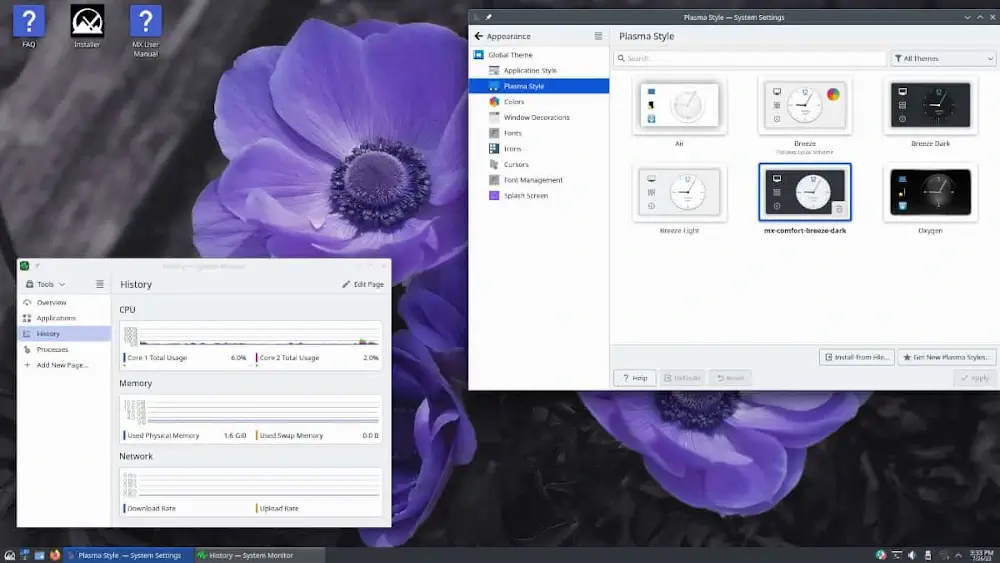
The KDE Plasma environment is famous for its powerful features such as KDE Connect and the Dolphin file manager. The MX KDE edition incorporates all these powerful features to create a high-performance desktop. It also offers extra themes, wallpapers, and icon sets, as well as all the MX Tools you’d find in the XFCE edition.
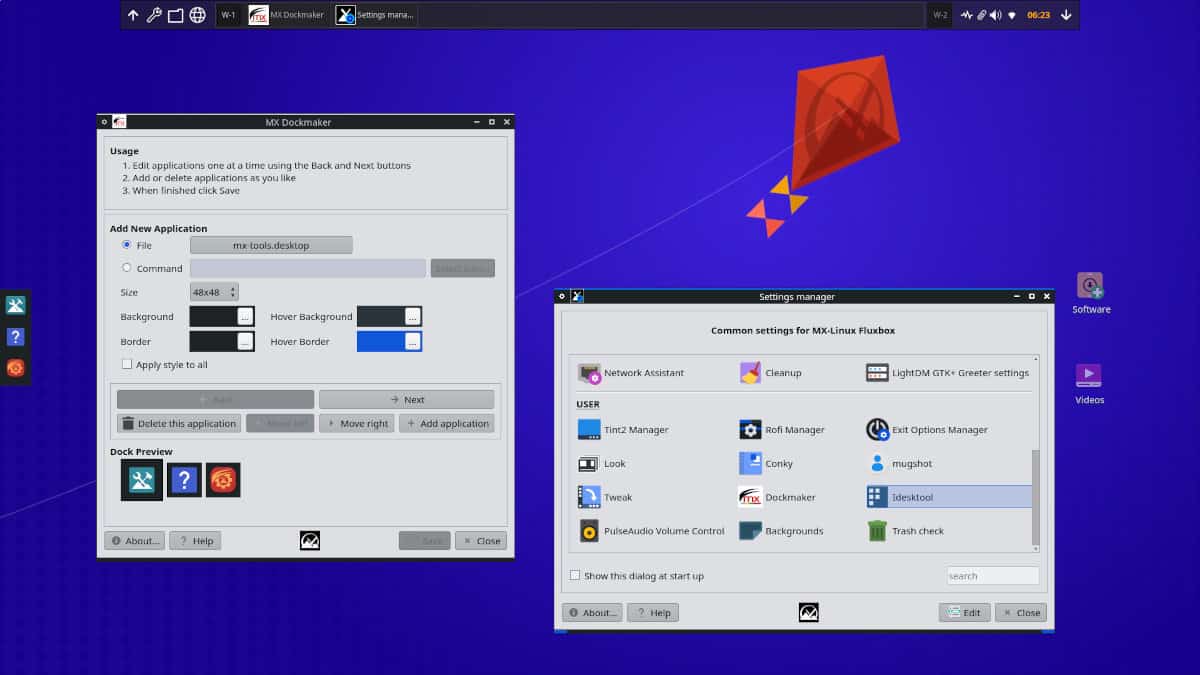
If you are looking to get even better performance out of your system you can choose the Fluxbox edition, which combines the speed of Fluxbox with the power of MX to create a unique desktop.
It is a fast edition with low graphical requirements and is perfect for both modern machines and older laptops with low specifications. Additionally, this version also contains several unique applications to spice up your user experience.
Although MX Linux describes itself as ‘midweight, you would be surprised to learn that it consumes 579MB of RAM after a fresh boot. MX Linux borrows some of the core elements of antiX Linux suited for older computers and builds on them to provide a more advanced environment.
All the special MX Linux applications weigh the same as normal GTK apps, so you can expect each one to use around 40 to 80MB.
Out of the box, MX Linux provides an assortment of apps for most use cases:
- LibreOffice: Office suite
- Firefox: Web browser
- Thunderbird: Email client
- Clementine music player: Music player
- VLC media player: Media player
- Thunar: File Manager
- Blueman: Bluetooth manager
- PDF Arranger: PDF tool
There are also a set of MX Tools that are common to all the MX Linux editions. These tools are unique to MX Linux and are designed to simplify everyday tasks.
Since MX Linux is based on Debian, it uses Synaptic Package Manager. Alternatively, you can use apt at the terminal to access all the MX Linux and Debian repositories.
The newest version of MX Linux is MX Linux 23, codenamed “Libretto“. It was released on July 31, 2023, and is based on Debian 12 ‘bookworm“. It is available in 64-bit and 32-bit for XFCE and Fluxbox versions and 64-bit for KDE Plasma.
That said, let’s look at how you can install MX Linux 23 step-by-step.
1. Download MX Linux ISO Image
To get started, you need the MX Linux ISO image file which will be used for installation. So, head over to the MX Linux download page and grab your preferred ISO file. As mentioned earlier, MX Linux is available in 3 editions: XFCE, KDE, and FluxBox.
Once you have downloaded ISO image. create a bootable USB drive using an application such as Rufus and plug it into the system. Then reboot your PC and be sure to modify the BIOS settings to have the bootable USB drive as the highest boot priority.
2. Booting MX Linux
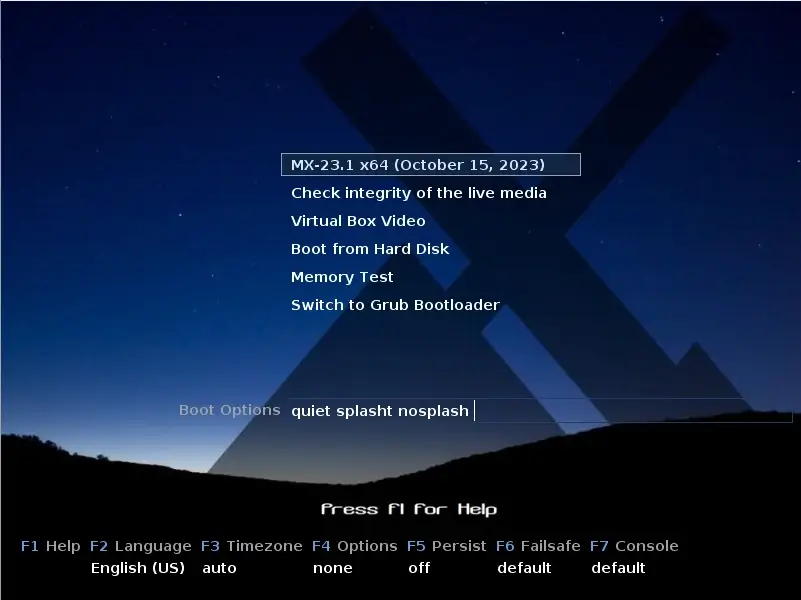
Upon rebooting, you will get the MX Linux screen as shown. The top-most option is preselected and this is what you need to select. So hit ENTER to proceed.
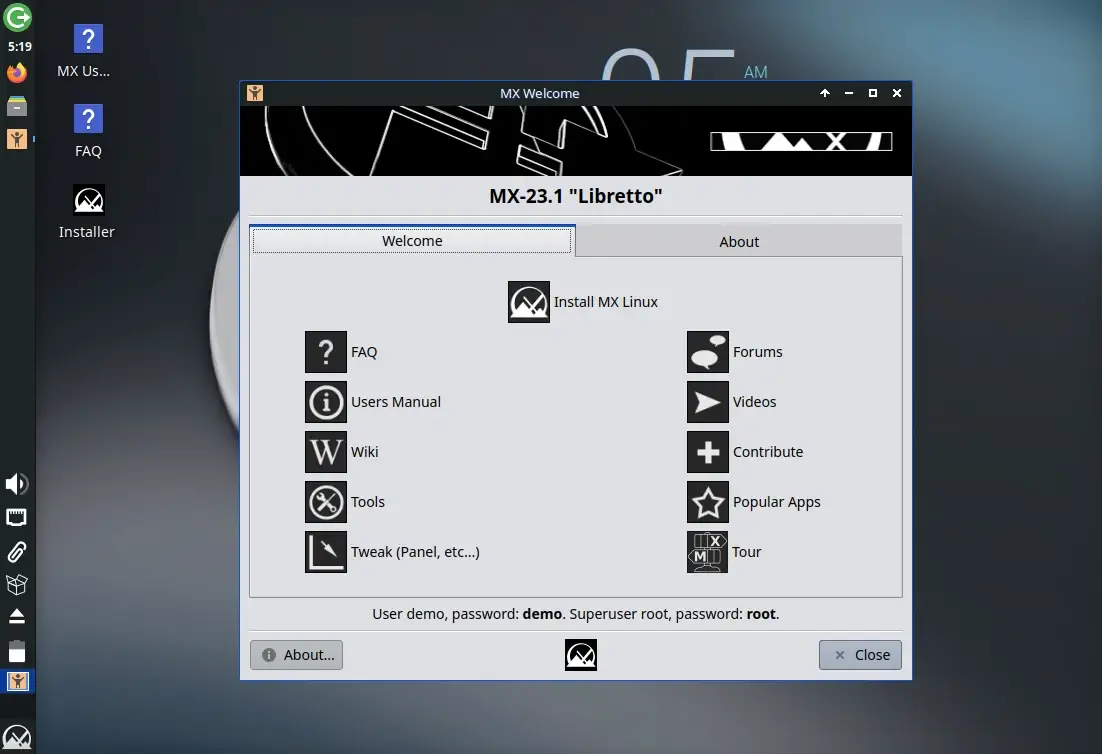
Once the system boots, you will get the following screen with a welcome dialogue box containing some useful links such as FAQs, User manual, Wiki, etc.
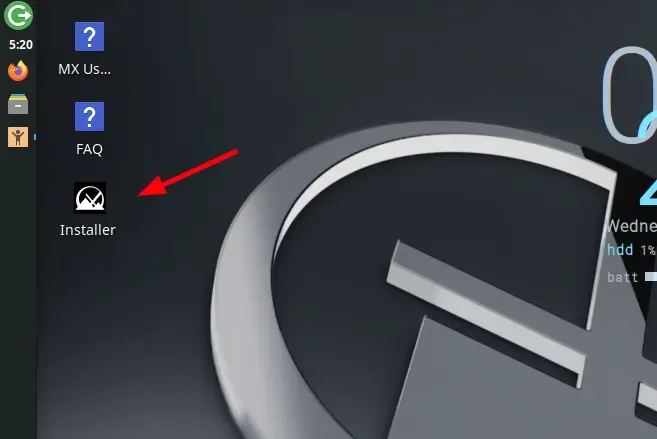
To proceed with the installation, minimize or close the welcome window and double-click the MX Installer as shown below.
3. Choose Preferred Keyboard Layout
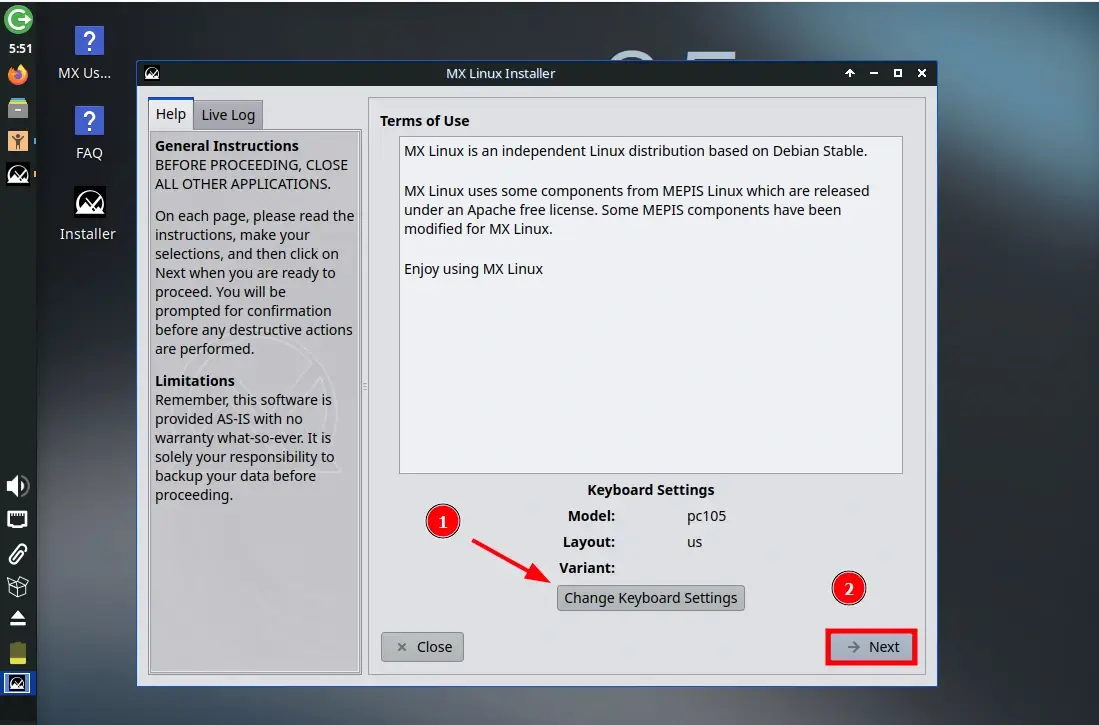
The installer will walk you through the installation steps. First, you will be required to select your preferred Keyboard layout. The default layout is US English. If you are okay with that simply click ‘Next’. Otherwise, click ‘Change Keyboard Settings’ and select your preferred layout.
4. Configure Disk Partitioning
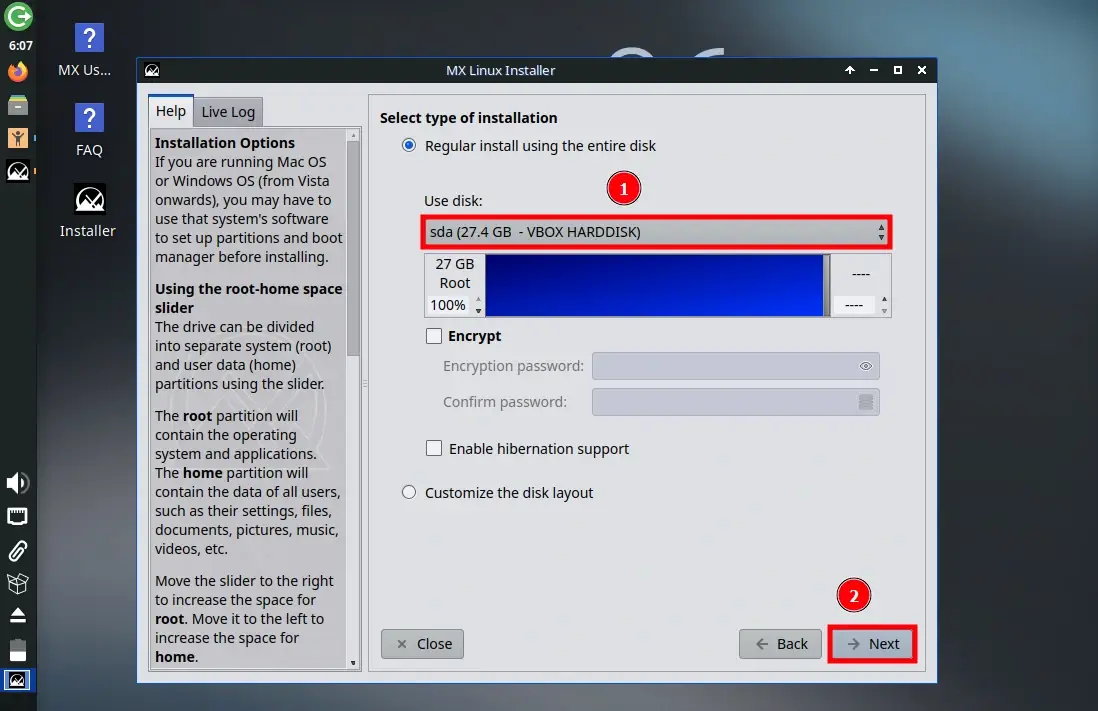
The next step, select your preferred hard disk partitioning scheme. For beginners, it’s recommended to go with regular partitioning where all the partitions such as /home, /var, /usr are placed under root.
So, select the first option and click ‘Next‘.
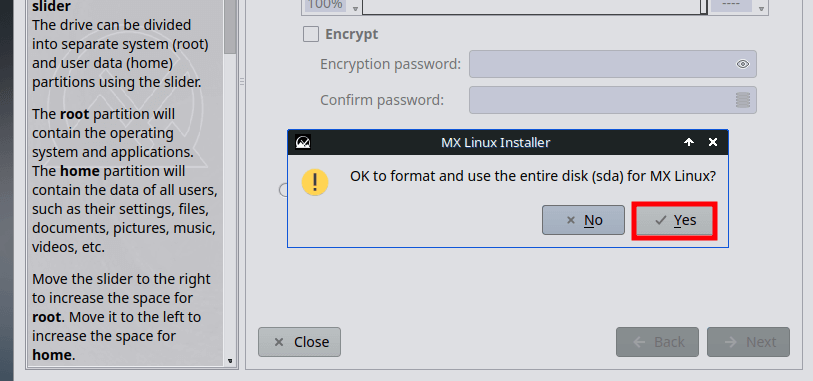
A pop-up will shown, asking you to format and use the complete disk and then click on ‘Yes‘ to continue.
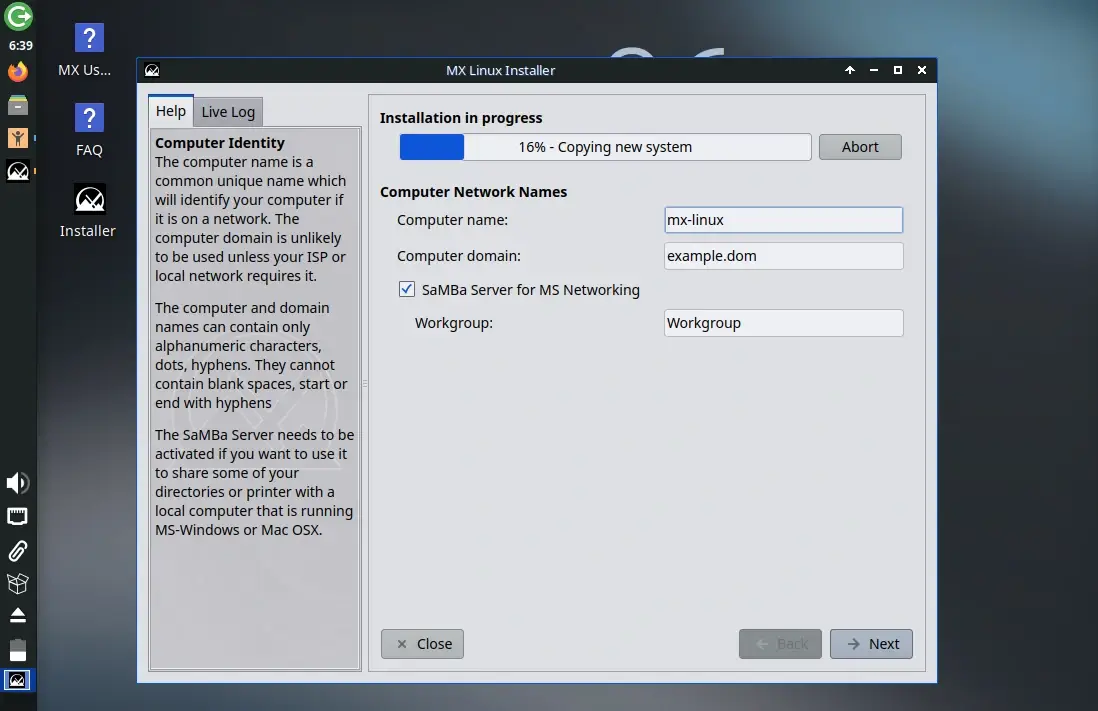
The installation will proceed and you ‘ll notice a progress bar at the top.
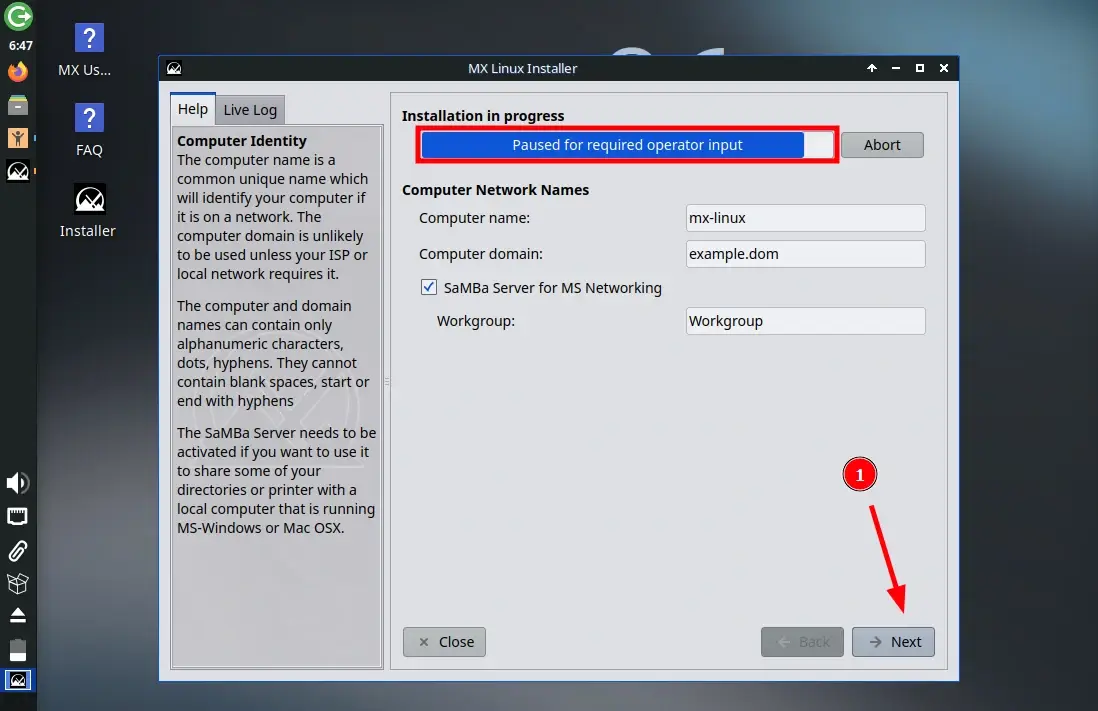
Be on the lookout for the prompt – Paused for required operator input – This implies that there are some pending tasks that you need to perform before moving forward.
Just click ‘Next’ to access the tasks.
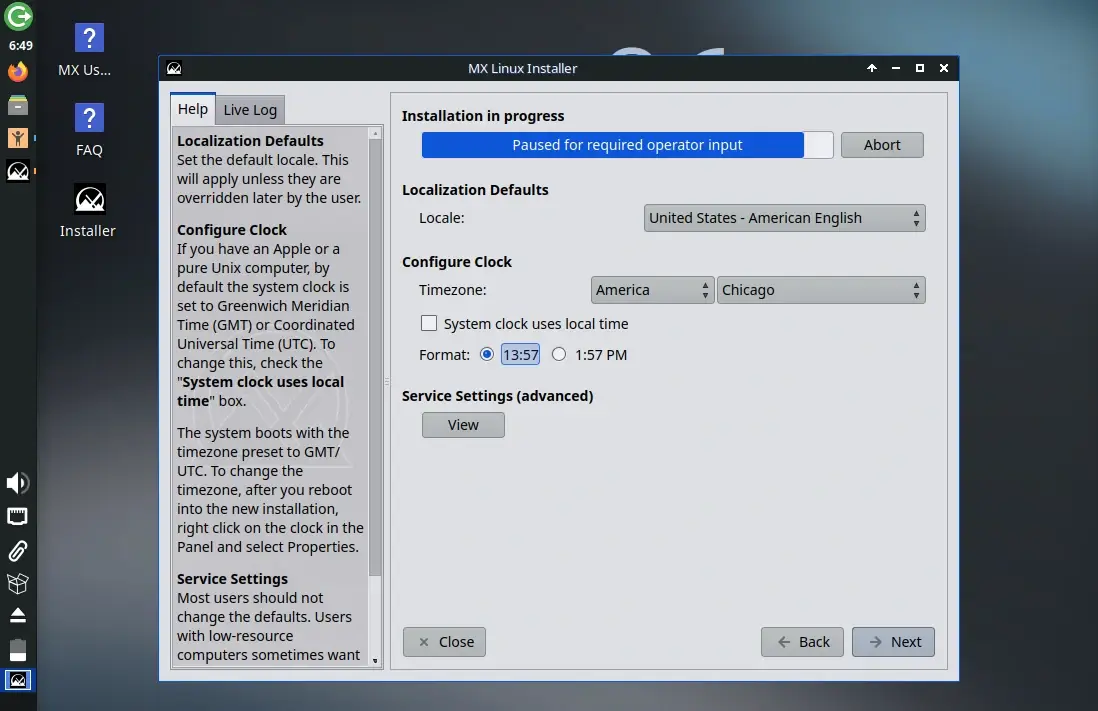
5. Configure Clock and Timezone
In this step, you need to set the correct timezone as well as time and date settings. Therefore, specify your locale, timezone, and clock format and click ‘Next’.
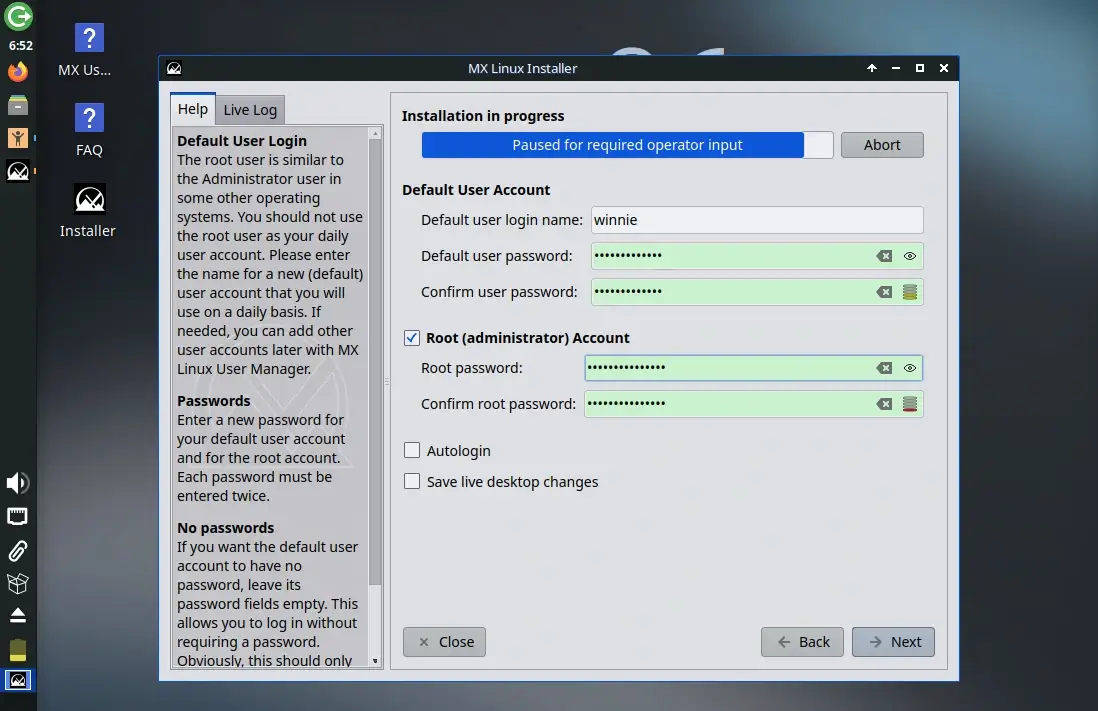
6. Create a User Account
Next, create the default user account that you will use to log in with as well as the root or administrator’s password. Then click ‘Next’.
7. Finish MX Linux Installation
Once the installation is complete, you will see a notification at the top as shown. To reboot, click Finish.
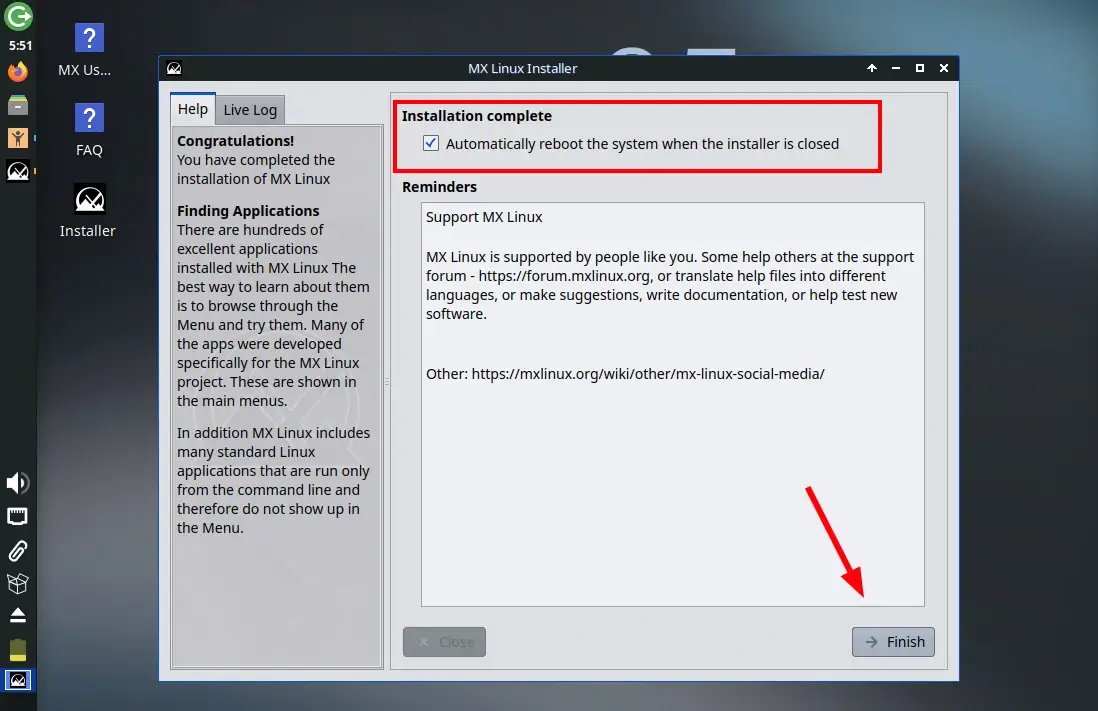
In addition, remember to remove the bootable medium so that you can boot into your new system.
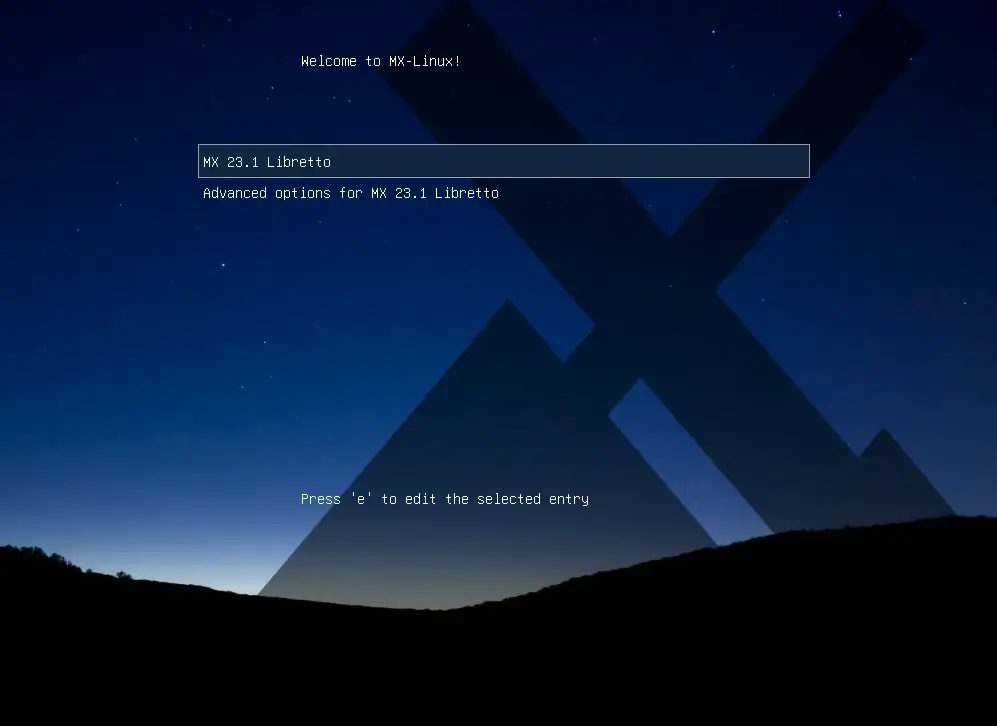
Once the system has successfully rebooted, the GRUB menu will appear below.
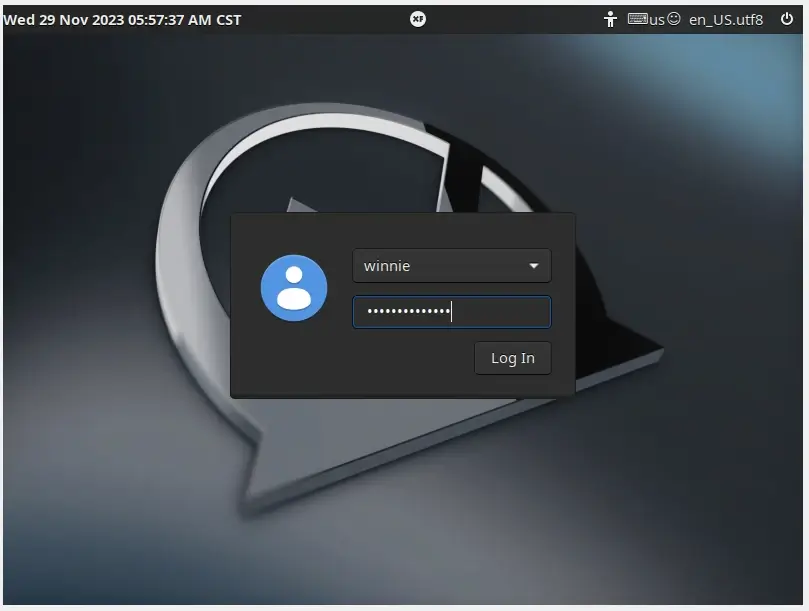
Provide your user password and hit ENTER or click ‘Login‘ to access your desktop environment.
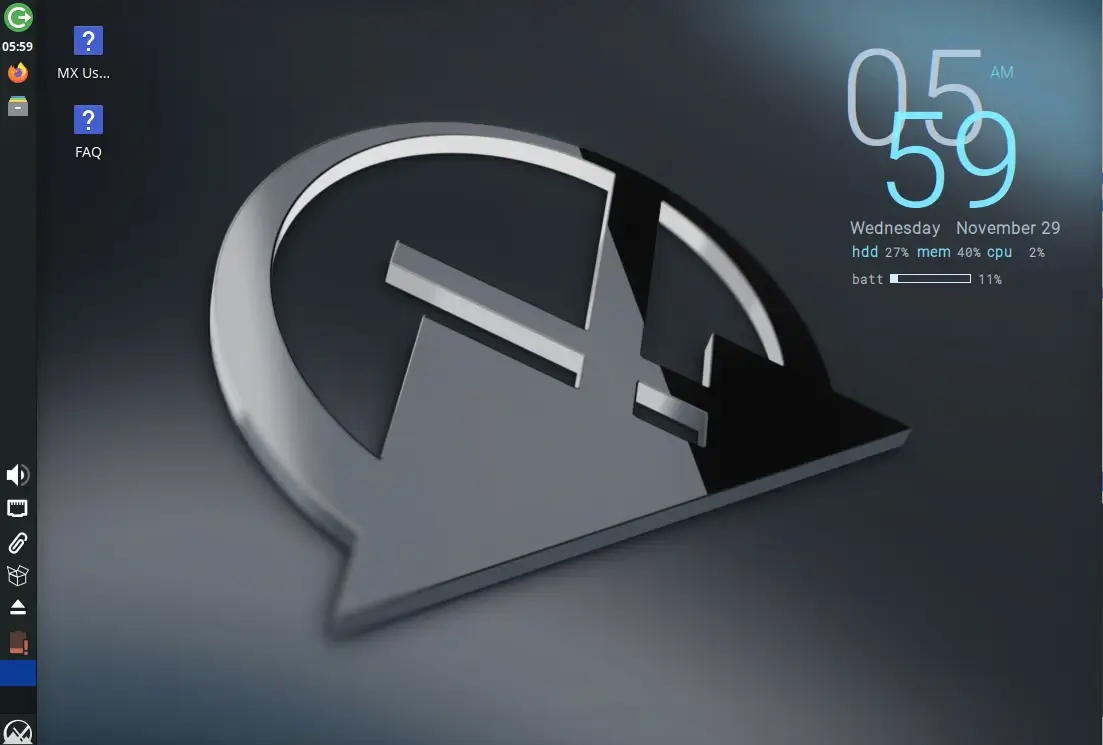
This ushers you to the brand-new MX Linux desktop.
Conclusion
We’ve come to the end of the installation of MX Linux. As you have seen it’s quite a straightforward process with minimal complexities. Have fun with your new MX instance!
